I'm so happy to be joining Yvonne at Stone Gable for her first linky party Tutorials Tips and Tidbits. This is going to be one fun party. It's also my first attempt at giving a tutorial on line, I hope you hang in with me until the end.
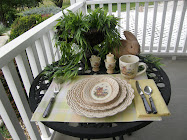
Last week I shared a new arrangement on the dining room table sporting this fabulous piece of fabric. For more pictures you can go
HERE. Let's get started shall we?
If you can sew in straight lines this project is for you. I like runners with some length to them, sometimes those sizes vary from 45" to 92" depending upon the table top it's going to be lying on. For this table I cut my piece of fabric 72" in length and 20" wide. Feel free to make yours as wide or as narrow as you like.
After folding my salvaged end over a 1/4" I folded it again a 1/4" and pressed it in place. I chose to press, press press instead of using pins. Feel free to do whatever makes you comfortable. Sew down along the edge of the fabric until you come to the end. Complete this step for all four sides.
Your finished sides will look like this. Pretty huh?
Your short end known as the end of the runner is now square, if you like you can leave it square. If you're like me I like a bit more pizazz to my runners. If you want at this step you can add a few embellishments adding fringed trim or even piping would give your squared edges a more professional look. Congratulate yourself you've just completed your first runner. Pretty quick and easy huh?
You know me I march to the beat of a different drum. I like my runners to have a bit snazzier look to them, using embellishments to give it more of a finished look. For this step you want to fold your edges towards the middle keeping them even and square forming a pointed edge, press into place.
I use pens on this next step, it keeps my fabric from shifting. Pen into place through all layers.
Taking your needle you're going to do a hidden whip stitch to hold the two pieces together. Make sure to go through just the top layers, you don't want your stitches to show on the top or right side of your fabric.
If you like you can machine stitch across the straight edge of your folded point. I don't care to see the stitching on the topside of my runner, so I whip stitch mine together. Feel free to do what makes you feel the most comfortable.
All whipped up, see no stitches showing.
Are you still with me? Great, let's keep going. In order to hold my edge in place I whip the edges together, going through the top layer of your fabric, this step keeps your fabric from shifting you'll see in the next step why I whip the edges together. Make sure you don't go through all the layers your stitches will show on the top side of your beautiful runner.
Now for a bit of fun. I like to use buttons that come close to matching my fabric.
Placing the tassel as close to edge as I can so it's a bit on the tight side, I whip stitch my button through the top layers of the fabric. Loop your tassel over the button and pull gently, this keeps your tassel in place. The reason I use buttons to attach my tassel is to be able to remove them when they need to be laundered or freshened up in the dryer. This also adds another bonus, if you choose to change out the colors of your tassels it's easy and quick.
Tadah!! Can we say gorgeous? Now your runner is ready to take it's place of honor on your tabletop.
I hope you enjoyed the tutorial of how I make my table runners. They're fun quick and easy projects. I hope you find the time to make one in your future.
hugs ~ Lynne ~